# Welcome to Divi Supply

We build Divi child themes, layouts, and more helpful resources to help you create better websites, faster. Everything is designed to be easy to use, flexible, and ready to launch.

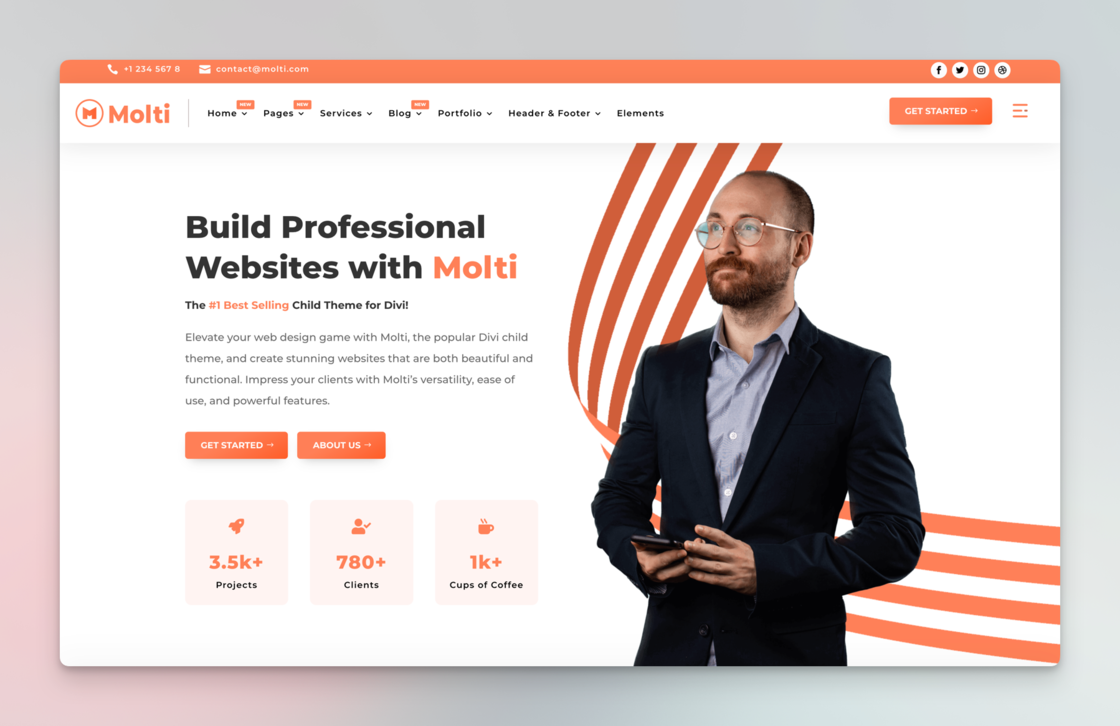
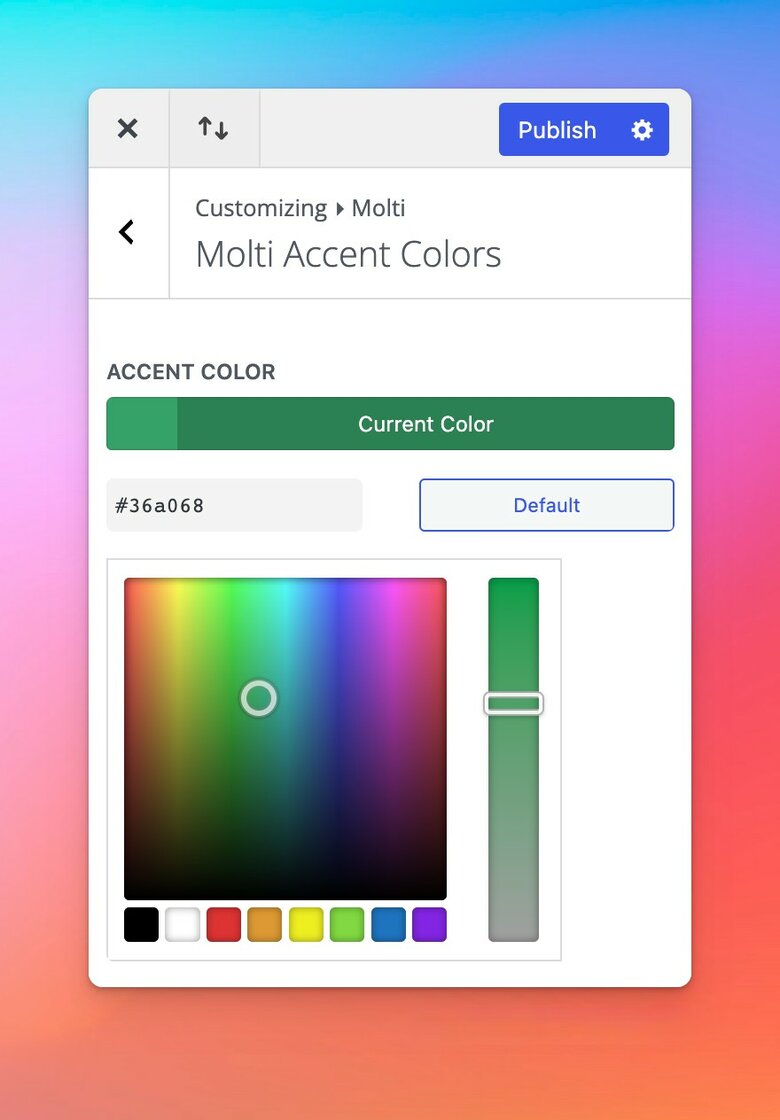
<table data-card-size="large" data-view="cards"><thead><tr><th></th><th data-hidden data-card-cover data-type="image">Cover image</th><th data-hidden data-card-target data-type="content-ref"></th></tr></thead><tbody><tr><td>Crest</td><td><a href="/files/0yc8iHdOZSvbxCuxZ7NM">/files/0yc8iHdOZSvbxCuxZ7NM</a></td><td><a href="/pages/bxF1YkFHjKDKUnk7zfiT">/pages/bxF1YkFHjKDKUnk7zfiT</a></td></tr><tr><td>Molti</td><td><a href="/files/krrPDAM8HzF0Ebkb0paO">/files/krrPDAM8HzF0Ebkb0paO</a></td><td><a href="/pages/-MgUODS5x-P2N1SgCAR8">/pages/-MgUODS5x-P2N1SgCAR8</a></td></tr><tr><td>Molti Ecommerce</td><td><a href="/files/wx1j4BuYTFe9Mid6vNBq">/files/wx1j4BuYTFe9Mid6vNBq</a></td><td><a href="/pages/-MgFJQwSHwnXgXRH-ZRp">/pages/-MgFJQwSHwnXgXRH-ZRp</a></td></tr><tr><td>Molti LMS</td><td><a href="/files/IqWxfLA7kbgHqVLwZEoM">/files/IqWxfLA7kbgHqVLwZEoM</a></td><td><a href="/pages/EjM0inQbCc9JOYdNCQc9">/pages/EjM0inQbCc9JOYdNCQc9</a></td></tr><tr><td>Florence</td><td><a href="/files/Tlc1KGhc5r9HXflFA3OC">/files/Tlc1KGhc5r9HXflFA3OC</a></td><td><a href="/pages/4A93HPi8lnl0c28DRb9b">/pages/4A93HPi8lnl0c28DRb9b</a></td></tr><tr><td>Supreme Store</td><td><a href="/files/KEiAd6m0y8Ce3MMrzxu7">/files/KEiAd6m0y8Ce3MMrzxu7</a></td><td><a href="/pages/Bzdw7RMp60LahvxWeqRP">/pages/Bzdw7RMp60LahvxWeqRP</a></td></tr><tr><td>Super Headers</td><td><a href="/files/jj9rFOGZR9eNbVGQ8AZ7">/files/jj9rFOGZR9eNbVGQ8AZ7</a></td><td><a href="/pages/BTUbLahhmx2OBxWiFXBu">/pages/BTUbLahhmx2OBxWiFXBu</a></td></tr></tbody></table>


# Using Our Products with Divi 5

### Divi 5 Compatible ✅

All our Divi Child Themes are now fully compatible with Divi 5. You can install any child theme with confidence and enjoy a smoother demo import process, along with a faster, more responsive building experience powered by the new Divi 5 Builder.

***

### Need Help?

If you have any questions or run into any issues, feel free to [contact us](https://divisupply.com/support).


# Divi 5 Compatibility Progress

We are actively working on bringing full compatibility with Divi 5 across all Divi Supply products.

This page provides a transparent overview of the current development status and will be updated regularly as progress is made.

***

### 🚧 In Progress

The following products are currently being updated for full Divi 5 compatibility:

#### Divi Layouts

* Pulse
* Super Headers
* Marko
* Consulting

***

### ✅ Migration Completed

#### Child Theme:

* Molti - [See changelog →](/molti/changelog)
* Molti Ecommerce - [See changelog →](/molti-ecommerce/changelog)
* Molti LMS - [See changelog →](/molti-lms/changelog)
* Florence - [See changelog →](/florence/changelog)
* Supreme Store - [See changelog →](/supreme-store/changelog)

More products will be updated soon. Keep an eye out.

***

### Updates

We are continuously working on updates and improvements. This page will be updated as soon as products move from **in progress** to **completed**.

***

### Need Help?

If you have any questions or need assistance, feel free to [contact us](https://divisupply.com/support/).


# Crest

<figure><img src="/files/trwxxKtjV7cw7r0ZfSuz" alt=""><figcaption></figcaption></figure>

[**Crest**](https://divisupply.com/divi-product/crest/) is a modern Divi 5 child theme created for SaaS companies, apps, startups, software products, and technology businesses.

Before installing Crest, make sure the Divi 5 parent theme is installed and active on your WordPress website. Divi is not included with the Crest package and must be purchased separately from Elegant Themes.

### Requirements

* WordPress
* Divi 5 installed and activated
* The latest version of the Crest child theme
* A fresh WordPress installation is recommended for the smoothest demo import

If you are installing Crest on an existing website, create a complete backup before importing the demo content.

### Recommended Server Requirements

For a smooth installation and demo import, we recommend the following PHP values:

* upload\_max\_filesize: 512M or higher
* max\_input\_time: 300 or higher
* memory\_limit: 512M or higher
* max\_execution\_time: 1000 or higher
* post\_max\_size: 512M or higher

These values are recommendations rather than strict requirements. You can check your website status under Divi → Support Center. If any values are too low, contact your hosting provider and ask them to increase the limits.

### What to Do Next

Start by installing and activating the Crest child theme. Once the theme is active, you can use the included demo importer to add the pages, Theme Builder templates, presets, and demo content to your website.


# Installing the Child Theme

How to install and activate the Crest child theme on your WordPress website.

Once you have downloaded Crest, you will receive a ZIP file named `crest.zip`. Keep this file zipped—you will upload it directly to WordPress.

Before continuing, make sure the Divi 5 parent theme is already installed on your website.

### Install Crest

1. Log in to your WordPress dashboard.
2. Go to Appearance → Themes.
3. Click Add New at the top of the page.
4. Click Upload Theme.
5. Choose the `crest.zip` file from your computer.
6. Click Install Now and wait for WordPress to finish the installation.
7. Click Activate to make Crest your active theme.

Crest is now installed and ready to use.

### If the Installation Fails

If WordPress reports that the parent theme is missing, install and activate Divi 5 first, then try activating Crest again.

If you see an invalid theme or missing stylesheet message, make sure you are uploading the original `crest.zip` child-theme file rather than the complete download package or an unzipped folder.

### Next Step

After activating Crest, continue to the Importing Demo Content article to add the complete demo website to your installation.


# Importing Demo Content

Import the complete Crest demo website and start customizing it with Divi 5.

After installing and activating Crest, a new Crest menu item will appear in your WordPress dashboard. Open it to access the demo importer.

For the best results, we recommend importing the demo on a fresh WordPress installation. If you are working on an existing website, create a complete backup first.

### Import the Crest Demo

1. In your WordPress dashboard, click Crest.
2. Open the demo import page.
3. Review the available import options.
4. On a fresh website, leave all options selected so the pages, media, menus, Theme Builder templates, presets, and settings are imported.
5. If you do not need a particular item, uncheck it before starting.
6. Click Import Demo Content.

The import may take several minutes depending on your server and internet connection. Keep the page open and do not refresh or close the browser while the process is running.

When the success message appears, the Crest demo content has been imported.

### After the Import

Visit the front end of your website and check that the pages, navigation, images, and Theme Builder templates are displaying correctly.

You can then begin replacing the demo text and images with your own content. To personalize the website colors, continue to the Change Color Scheme article.

If the importer offers a Remove Demo Content & Import Functions option, you can use it after a successful import to remove the importer from your WordPress dashboard. This does not remove the content you imported.

But, We recommend keeping the demo importer active on your website, as it includes a helpful **Restore Content** feature. If you accidentally delete a page or any other demo content, you can use this feature to restore individual pages or all of the original child theme content/pages, without running the complete import again.


# Change Color Scheme

Change Crest's site-wide colors quickly with the Divi 5 Variable Manager.

Crest uses Divi 5 Design Variables to manage the main colors used throughout the website. This means you can update the color scheme from one central place instead of editing every section and module individually.

### Open the Variable Manager

1. Open any page on your Divi site..
2. Click Enable Visual Builder.
3. In the Divi Builder sidebar, click the Variable Manager icon.
4. Open the Colors section to view the color variables included with Crest.
5. Update the **Primary** and **Secondary Color** with your own.

<div data-with-frame="true"><figure><img src="/files/z0QlTU0gTD9AqZizcw1T" alt=""><figcaption></figcaption></figure></div>

And that's it, this will replace all the colors across your site.


# Important: Import the ACF Settings

Import Crest's ACF configuration for the testimonial and changelog management features.

Crest uses Advanced Custom Fields (ACF) to power its testimonial and changelog management features. You must import the included ACF JSON file to add the required custom post types, field groups, and custom fields to WordPress.

### Before You Begin

The plugin is automatically installed after demo import process.

The ACF import file is supplied in a ZIP archive named `[Unzip-First] ACF Import.zip`. You cannot upload this ZIP file directly to ACF—it must be unzipped first.

After extracting the archive, you will find the following file:

* `ACF Import.json`

### Import the ACF JSON File

1. Unzip `[Unzip-First] ACF Import.zip` on your computer.
2. Log in to your WordPress dashboard.
3. Go to ACF → Tools.
4. Open the Import section.
5. Click Choose File and select `ACF Import.json`.
6. Click Import JSON.
7. Wait for ACF to confirm that the import has completed successfully.

### What the Import Adds

The JSON file imports the ACF settings required by Crest, including:

* Custom post types for client testimonials and changelog entries
* Custom fields used to manage testimonial information
* Custom fields used to manage product updates and changelog details
* The field groups and settings that connect this content to the Crest layouts

Once the import is complete, the testimonial and changelog options should appear in your WordPress dashboard. You can then add, edit, and manage entries without changing the Divi page layouts manually.

### Important

Do not import the ZIP archive into ACF. If you receive an invalid-file message, make sure you have extracted the archive and selected the `ACF Import.json` file itself.

If the new post types or fields do not appear immediately, refresh the WordPress dashboard and confirm that the Advanced Custom Fields plugin is active.


# Changelog

👉 1.0.1

* General Improvements and minor bug fixes.

***

👉 1.0

* The initial release of Crest.


# Molti

<figure><img src="/files/-MgUzyvXUQiX6HUmD8Y0" alt=""><figcaption></figcaption></figure>

In order to install the [**Molti**](https://samarj.com/molti) Child theme, you must first purchase the [Elegant themes Membership](https://www.elegantthemes.com/affiliates/idevaffiliate.php?id=56146\&url=55671) and Download [Divi theme](https://www.elegantthemes.com/affiliates/idevaffiliate.php?id=56146\&url=55671).

Molti is fully compatible with Divi v4.9+; just ensure you’ve installed the latest version of the Divi theme. Some features may not work correctly if the Divi theme version is less than v4.9.

### **Requirements**

* Divi Theme
* Fresh Installation of WordPress (Recommended)

### Server Recommended Requirements

* upload\_max\_filesize (512M or more)
* max\_input\_time (300 or more)
* memory\_limit (512M or more)
* max\_execution\_time (1000 or more)
* post\_max\_size (512M)

{% hint style="info" %}
These are just recommended values. If you've got a Congrats Message in your Divi -> Support Center, then you're good to go; please Contact your hosting support and ask them to increase these values if you don't have a Congrats message in Divi Support Center.
{% endhint %}

We have also created a full Video Tutorial for Molti Installation and how to set it up Step-by-Step! You can watch it here:&#x20;

{% embed url="<https://youtu.be/5XWHeg3NhfY>" %}
Click the Video Title to see the Video on Youtube for Timestamps and Links Mentioned in the video!
{% endembed %}

Hopefully, you'll find it useful and make an Epic Website with Molti.


# Installing the Child Theme

Once you’ve downloaded the Child Theme you'll get a file named "molti.zip" that you need to work with.

<figure><img src="/files/xyiw0NtkQozX2A5ijm2H" alt=""><figcaption></figcaption></figure>

Now go to your WordPress Dashboard and go to Appearance -> Themes and here click the "Add New" button at the top.

![](/files/ienBgrWm14MYGjdI68LU)

Now click on the Upload Theme button at the top and then upload the “molti .zip” here and click on the Install Now button.

![](/files/5AfaYQchrBV52gNpzVks)

After that click on the "Activate" Button to activate the Molti Theme.

![](/files/hwNNqQV5poXh8ORjsPh3)

With that, It will install the Molti Theme on your site.

<figure><img src="/files/WN1pjXWb9iDMXa2nAQcW" alt=""><figcaption></figcaption></figure>

Now click the below button to see how to Import Demo Content.

{% content-ref url="/pages/-MgV-60eSSeQBSMHimiq" %}
[Importing Demo Content](/molti/importing-molti-demo-content)
{% endcontent-ref %}


# Importing Demo Content

After Installing the Molti theme on your site, you'll now see a new Menu Item in your WordPress admin; click on it.

And then, on this page, you'll see all the Molti Import Options. You can uncheck things If you don't want to import something. But If you're installing on a Fresh Website, ensure all the options are checked and then hit the "Import Demo Content" button.

![](/files/Z4LKNNCLP7cMDE32vwno)

The Import process could take some time here, depending on your internet connection, so you don’t need to worry about that.&#x20;

After the Import is complete, you’ll see a message like this. You can hit "Remove Demo Content & Import Functions" to remove the Import function from your site since it's needed anymore.

![](/files/C3TKbF6n5caSPQNDiesh)

And that’s it. That’s how easy It was to Import the Molti Demo Content with this all-new Demo Content Importer.

{% hint style="info" %}
If you’re facing any issues with the Import Process, Please [**Send Us a Message**](https://samarj.com/contact) & we’ll try our best to help you out.
{% endhint %}

### 🛠️ Fixing Common Import Issues

Here are quick fixes to some of the most common import issues.

{% tabs %}
{% tab title="Issue #1 - Solution" %}
Let's discuss the #1 issue that we face most of the time, and that is it's only showing "WP Import Options" or just an empty space in the Import area.&#x20;

Thankfully, there's a quick fix for that: go to the Support Menu of the Theme Import options and click the **Reset Button** at the botto&#x6D;**.**

Now, you'll need to set the **Batch size**. We recommend you set it to 10.

<figure><img src="/files/f6Wnk1xPOaHMCovhsNVN" alt=""><figcaption></figcaption></figure>
{% endtab %}

{% tab title="Issue #2 - Solution" %}
This one might be the strangest, and it's infrequent; sometimes, the Importer calls for the Import files from the Plugins folder instead of the Themes folder.&#x20;

To quickly fix the issue, move the Theme Folder from the "Themes" Folder to the "Plugins" Folder, and then you'll be able to import the demo content without any issues.&#x20;

Here's a video recording to help you with this process. You may speed it up.

{% embed url="<https://cln.sh/GTwj9ymM>" %}

After Importing demo content, you can delete the Theme Files from the Plugins Folder.
{% endtab %}

{% tab title="Issue #3 - Solution" %}
This is also a very rare one, and mostly Flywheel users have this issue. If you've enabled **Password Protection** on your site, you may need to disable it to be able to import the demo content.
{% endtab %}
{% endtabs %}


# Important Settings

Once you’re done with Installation & Importing Demo Content. You’ll have to make these changes to make sure everything is perfect.

### 🔎 Permalink

Go to Settings -> Permalinks and change Permalink to “Post Name” and Save the Changes.

![](/files/-MgV0hLb_UF4zuN_Frtn)

To avoid any issues, It's recommended to change permalink to Post Name!


# Change Color Scheme

Want to change the color scheme of your site built using the [Molti](https://samarj.com/molti) Child Theme? This guide will help you do so in 2 simple steps!

{% hint style="info" %}
**Important**: This Guide Has Been Updated!
{% endhint %}

### Step 1. Change the Buttons Color from the Preset <a href="#id-0-toc-title" id="id-0-toc-title"></a>

Open any page using the Visual Builder and open the Button Module settings, then click on the Preset link below the Module Name in the Modal. Then, Edit the “Main Gradient Button” Preset Styles. The Modal will flip, then open the Design tab -> Button -> Button Background -> and here edit the Gradient Color or add your own solid color by removing the Gradient Color.

{% embed url="<https://cln.sh/6QTnTWjM>" %}

### Step 2. Change Color from Theme Customizer <a href="#id-3-toc-title" id="id-3-toc-title"></a>

* Now you can easily change the **Accent Color/Color Scheme** of Molti in One Click. Simply go to Customizer -> Molti -> Molti Accent Colors and here you can Change the Color to your Brand Color. And It will change the Colors on your whole site in one click. &#x20;
* You'll also see the option to change the **Top Bar** color here that appears above the Header.
* Secondly, go to Appearance -> Customizer and then go to General -> Typography -> and change Body Link Color.

<div><figure><img src="/files/F8ivhZAW8kzDEmGvXxft" alt=""><figcaption><p>Customizer -> Molti</p></figcaption></figure> <figure><img src="/files/BD4AoKCxBDQTXTHx6VR0" alt=""><figcaption><p>Customizer -> General Settings -> Typography</p></figcaption></figure></div>

{% hint style="info" %}
If you see that some colors are still orange, that's probably because they can be changed from within the Module Settings by enabling Divi Builder on the Page.
{% endhint %}


# Molti Theme Customization

So you’ve purchased Molti Child Theme? You’ve made one of the best decisions in your life. So In this guide, we’ll see how you can customize the Molti Child Theme to make sure the Molti is your very own website.

## How to Change Header and Footer

### Change Header

Molti Comes with 6 different and cool-looking Header Designs to choose from. So If you’d like to change to any of the other designs for your Main Header. First, go to Dashboard -> Pages and search for “Header Designs” and Edit with Divi Builder. Once you’re in the Divi Builder, copy the Header section you’d like to use and then come to Divi -> Theme Builder -> Edit Global Header and paste the Section here. That’s it.

{% embed url="<https://streamable.com/lr0dvl>" %}

### Change Footer

Molti Theme also provides you 6 awesome-looking Footer Designs to choose from. The process is pretty much the same as you’ll do to change the Header Design. Go to Dashboard -> Pages and search for “Footer Designs” and Edit with Divi Builder. Once you’re in the Divi Builder, copy the Footer section you’d like to use and then come to Divi -> Theme Builder -> Edit Global Footer and paste the Section here. Said you, It’s pretty much the same process!

{% embed url="<https://streamable.com/6izgfs>" %}

## Change Testimonial Images

Want to change those Testimonial Images on the Homepage of the Molti Theme? Then this will help you with that. For that, please go to Appearance -> Theme Editor and then Select Molti Theme and then select style.css file. And then scroll to the line 330 and from there you’ll be able to change the Images easily. You’ll have to change the Image URLs on line 334 for the first Image and so on. As in this image.

![](/files/-MgV4fQtSfyjGr7Vg4wR)

## Make Divi Header Sticky on Scroll

You can easily make your Molti Header Sticky on Scroll. For that, go to Divi -> Theme Builder -> Edit Global Header, and open the Section/Row Settings that you want to make sticky on Scroll. In the Settings go to Advanced Tab -> Scroll Effects -> Sticky Position -> Stick to Top. Then Save the Changes and check your Header on Frontend.

![](/files/-MgV4fvU7JttERz-X97n)

## Change Features Section Hover Icon Color

On the Homepage Feature Section, you see Icon Hover Effect and to change their color you can follow the screenshot below.

![](/files/TPg281f9PN1Qrq6AqUtC)

## Services Card Hover Color

The Services Cards shown on the Services Page looks really cool with an awesome hover effect. But here's how to change the color of that card. Go to the Row settings -> Column Settings -> Advanced tab -> Custom CSS -> Before and here change the color code. This video will help:

{% embed url="<https://streamable.com/0oz1a9>" %}

## Edit Advance Dropdown Menu

If you want to customize the Advance Dropdown Content, go to Dashboard -> Divi -> Theme Builder -> Edit Global Header and here Enable the Layers View and look for 3rd Section and you can expand the Layers View to edit the content of Dropdown.

Video Walkthrough:&#x20;

{% embed url="<https://cln.sh/C1h5vh>" %}

## Edit Footer For Mobile

We get this question often, that the footer is reverted to Molti's Default footer on Mobile. That's because, we've built a separate section for Mobile Footer, due to responsiveness. To edit it, you'll have Edit the Global Footer and then go to Mobile/Tablet View and then you'll be able to edit.

**Alternatively**, you can enable the switch "Show Disabled Module at 50% Opacity" to see the Mobile Footer on the Desktop to edit it while being in Desktop view. See this image.

![](/files/6GJH9TrpbieIet6SrlM7)

## Changing the Images-Based Testimonials Content

This is the Testimonial section that you'll find on the Services page, and here's a video to help you edit the content of all 4 Testimonials in this design:

{% embed url="<https://cln.sh/XJrQm5BR>" %}

## Change /Customize the "New" Text in Menu

Do you want to change the test in the "New" indicator in the Menu or Want to change the test in the "New" indicator in Menu or change the Background color? For that, go to Dashboard -> Appearance -> Theme Editor -> select Molti - Ecommerce -> Go to style.css and search for "new symbol," and you'll see the CSS for the New indicator. You can see the screenshot below to learn how to customize things:

![](/files/UYyA7H4aWaAFEi8LC0oQ)

To add the New Indicator to any Menu Item you wish, you need to add Class to the Menu Item.

{% hint style="info" %}
To see the "CSS Classes" option for menu items, click "Screen Options" at the top and check the "CSS Classes" options.
{% endhint %}

* For Main Item = molti-new-icon main
* For Sub Menu Item = molti-new-icon

![](/files/MAAbuY9unnMmAxkavVdc)

## Changing Content for Tabs on Home V2

To edit the content of the Tabs that you see in Home V2, you can simply go to Layers View and remove a letter from the class that is added to the Row to show that Row in the Divi Builder and edit the content.&#x20;

Once you're done with editing the content, add the class letter back to hide the row so that it only shows once the user opens the tab.

Here's an easy video guide:

{% embed url="<https://cln.sh/nJ9SrYMp>" %}

## Add More Tabs in Home V2

Adding More tabs is super simple; simply duplicate the tabs and the content and remove the active class, and you're done.

Here's a video guide:

{% embed url="<https://cln.sh/xNkMvYWV>" %}

## Change /Customize the "New" Badge in Menu

Do you want to change the text in the "New" indicator Badge in the Menu or change the Background color and more? For that, go to Dashboard -> Appearance -> Theme Editor -> select Molti - Ecommerce -> Go to style.css and search for "new symbol," and you'll see the CSS for the New indicator. You can see the screenshot below to learn how to customize things:

![](/files/UYyA7H4aWaAFEi8LC0oQ)

### Add or Remove the "New Badge" from the Menu Item.

To add the New Indicator to any Menu Item you wish, you need to add Class to the Menu Item.

{% hint style="info" %}
To see the "CSS Classes" option for menu items, click "Screen Options" at the top and check the "CSS Classes" options.
{% endhint %}

* For Main Item = **molti-new-icon main**
* For Sub Menu Item = **molti-new-icon**

If you want to remove the Badge from the Menu Item, remove the Class from that Menu Item.

![](/files/MAAbuY9unnMmAxkavVdc)

## Make Equalize Column Height Option Work

In Molti, we have added custom CSS to change the option for equalizing column height and enabling vertical content centering in a section. However, some users would like the "Equalize Column Height" option to be restored. No worries! It's a simple process. Just remove the CSS mentioned below from the style.css file:

<figure><img src="/files/L4XAiltsBymGa6jgJCs4" alt=""><figcaption></figcaption></figure>

## Edit Pricing Section Tooltip Content

To edit the content for the Pricing Page tooltips, where a tooltip appears next to some items that's helpful in providing more info about a Pricing feature, watch the video below.

{% embed url="<https://cln.sh/snL6ZDyW>" %}


# Complete Video Tutorial

We have also created a full Video Tutorial for Molti Installation and how to set it up Step-by-Step! You can watch it here:&#x20;

{% embed url="<https://youtu.be/5XWHeg3NhfY>" %}
Click the Video Title to see the Video on Youtube for Timestamps and Links Mentioned in the video!
{% endembed %}

Hopefully, you'll find it useful and make an Epic Website with Molti.


# Changelog

👉 1.3 - Mar 29, 2026

* **New – Now fully compatible with Divi 5.**
* New – All-new demo importer, now faster and more reliable than before.
* Improved – Updated to use Divi 5’s latest features and improved performance.
* Fixed – Multiple bug fixes and stability improvements.

***

👉 1.2.2 - Mar 23, 2024

* Compatibility Update for Latest WordPress & Divi Version.

***

👉 1.2.1 - Jun 07, 2023

* Fixed - New Pages not showing in the Menu Bar.

***

👉 1.2 - Jun 04, 2023 - **BIG UPDATE**

* **New** - Add 7 New Pages (Home V2, FAQ Page, Coming Soon, Privacy Policy, Testimonials Page, Team Page & Blog List)
* Fixed multiple minor bugs and many more enhancements!

<div align="left" data-full-width="false" data-with-frame="true"><img src="https://cloud.headwayapp.co/changelogs_images/images/big/000/109/172-032fdf4506bd4f78524ec7e937c584c3ea8b33b9.png" alt="2023-06-05 at 19.41.13.png" height="363" width="560"></div>

***

👉 1.1.5 - Mar 18, 2023

* **New** - Moved to a new Demo Content Importer for Molti (Reliable and Faster)
* Enhanced - Color Changer Feature
* Fix - Sub Sub Menu was not working correctly
* Other Small Fixes

***

👉 1.1.4.1 - Dec 13, 2022

* Fixed - Issue with Dropdown not showing

***

👉 1.1.4 - Dec 09, 2022

* Added - Option to change Top Bar Color & Enhanced Color Change Feature
* Fixed - Social Icons not clickable Team Card
* Fixed - Mobile Menu Scroll

***

👉 1.1.3 - Sep 07, 2022

* **Added** - Option to Change Color Scheme in One Click under the Theme Customizer.

<div align="left"><img src="https://cloud.headwayapp.co/changelogs_images/images/big/000/094/652-889bc87a1431af4589bf5dc6f6ae4c556ed54c7f.jpg" alt="Molti Color Feature.png" height="402.05" width="280"></div>

***

👉 1.1.2 - May 21, 2022

* Fixed - Issue with Content Switch Z-Index caused by latest Divi
* Fixed - Gradient Button Hover Transparent Color caused by latest Divi
* Fixed - Issue with Mega Menu
* Fixed - Issue with Tabs on Single Post & Single Job Page
* **Added** - Script to fix the Flash of Unstyled Content.

***

👉 1.1.1 - Aug 18, 2021

Ability to Import Presets with Demo Import - Saves you time!

***

👉 1.1

Introducing an All-New Demo Content Importer for Easy Import Process.

***

👉 1.0

The initial release of Molti.


# Molti Ecommerce

![](/files/-MgRHTSlnJ5o2tVBZ17h)

In order to install the [**Molti Ecommerce**](https://samarj.com/molti-ecommerce/) Child theme, you must first Purchase [Elegant themes Membership](https://www.elegantthemes.com/affiliates/idevaffiliate.php?id=56146\&url=55671) and Download [Divi theme](https://www.elegantthemes.com/affiliates/idevaffiliate.php?id=56146\&url=55671).

Molti Ecommerce is fully compatible with Divi v4.9+, just make sure that you’ve installed the latest version of the Divi theme. Some features may not work correctly if the Divi theme version is less than v4.9.

### **Requirements**

* Divi Theme
* Fresh Installation of WordPress (Recommended)
* WooCommerce

### Server Recommended Requirements

* upload\_max\_filesize (512M or more)
* max\_input\_time (300 or more)
* memory\_limit (512M or more)
* max\_execution\_time (1000 or more)
* post\_max\_size (512M)

{% hint style="info" %}
These are just recommended values. If you've got a Congrats Message in your Divi -> Support Center, then you're good to go; please Contact your hosting support and ask them to increase these values if you don't have a Congrats message in Divi Support Center.
{% endhint %}


# Installing the Child Theme

Once you’ve downloaded the Child Theme Files, first extract the Zip file and you'll get 2 files named "molti-ecommerce.zip" and "Molti Ecommerce Supplementary Files.zip" that you need to work with.

<figure><img src="/files/j6m0IbhDhyMXIyrD0Mnh" alt=""><figcaption></figcaption></figure>

Now go to your WordPress Dashboard and go to Appearance -> Themes and here click the "Add New" button at the top.

![](/files/kBbdViE2VY99KjxQAusU)

Now click on the Upload Theme button at the top and then upload the “molti-ecommerce.zip” here and click on the Install Now button.

![](/files/JXrJ3fPFhNsrg5O77ouR)

After that click on the "Activate" Button to activate the Molti Ecommerce Theme.

![](/files/IYDhJwqT3FrQ4pTFzUJb)

With that, It will install the Molti Ecommerce Theme on your site.

<figure><img src="/files/QYlH3JYLw5byVER4Njkc" alt=""><figcaption></figcaption></figure>

Now click the below button to see how to Import Demo Content.

{% content-ref url="/pages/-MgV-60eSSeQBSMHimiq" %}
[Importing Demo Content](/molti/importing-molti-demo-content)
{% endcontent-ref %}


# Importing Demo Content

After Installing the Molti Ecommerce theme on your site, you'll now see a new Menu Item in your WordPress admin, simply click on it.&#x20;

And then on this page, you'll see all the Molti Ecommerce Import Options and you'll also see the Required Plugins that are needed to run Molti Ecommerce. You can uncheck things If you don't want to import something. But If you're installing on a Fresh Website, make sure all the options are checked and then hit the "Import Demo Content" button.

![](/files/gauHqOgHXq5jMmsbqoLX)

The Import process could take some time here depending on your internet connection, so you don’t need to worry about that.&#x20;

After the Import is complete you’ll see a message like this. You can hit "Remove Demo Content & Import Functions" to remove the Import function from your site since it's needed anymore.

![](/files/V9amZmBLTXOLabEnJx0s)

And that’s it. That’s how easy It was to Import the Molti Ecommerce Demo Content with this all-new Demo Content Importer.

{% hint style="info" %}
If you’re facing any issues with the Import Process, Please [**Send Us a Message**](https://samarj.com/contact) & we’ll try our best to help you out.
{% endhint %}

Now Make sure to do all the Important Settings, so that everything works as shown in the Demo. Click the below button to see the Important Settings you need to do:

{% content-ref url="/pages/-MgR5cl0I0YzE-RURoGW" %}
[Important Settings](/molti-ecommerce/molti-ecommerce-important-settings)
{% endcontent-ref %}

### 🛠️ Fixing Common Import Issues

Here are quick fixes to some of the most common import issues.

{% tabs %}
{% tab title="Issue #1 - Solution" %}
Let's discuss the #1 issue that we face most of the time, and that is it's only showing "WP Import Options" or just an empty space in the Import area.&#x20;

Thankfully, there's a quick fix for that: go to the Support Menu of the Theme Import options and click the **Reset Button** at the botto&#x6D;**.**

Now, you'll need to set the **Batch size**. We recommend you set it to 10.

<figure><img src="/files/f6Wnk1xPOaHMCovhsNVN" alt=""><figcaption></figcaption></figure>
{% endtab %}

{% tab title="Issue #2 - Solution" %}
This one might be the strangest and infrequent; sometimes, the Importer calls for the Import files from the Plugins folder instead of the Themes folder.&#x20;

To quickly fix the issue, move the Theme Folder from the "Themes" Folder to the "Plugins" Folder, and then you'll be able to import the demo content without any issues.&#x20;

Here's a video recording to help you with this process. You may speed it up.

{% embed url="<https://cln.sh/GTwj9ymM>" %}

After Importing demo content, you can delete the Theme Files from the Plugins Folder.
{% endtab %}

{% tab title="Issue #3 - Solution" %}
This is also a very rare one, and mostly Flywheel users have this issue. If you've enabled **Password Protection** on your site, you may need to disable it to be able to import the demo content.
{% endtab %}
{% endtabs %}


# Important Settings

Once you’re done with Installation & Importing Demo Content. You’ll have to make these changes to make sure everything is perfect.

### 🔗 Permalink

Go to Settings -> Permalinks and change Permalink to “Post Name” and Save the Changes.

![](/files/-MgR7QdZvfAH5vnVcB1p)

### 🔎 Quick View

Now we’ll need to go to YITH -> Quick View and in the “Quick View Button Label” we need to replace the text with a capital U and Save Changes. This will show the Search icon for the Quick View Icon on the Shop Module.

![](/files/-MgR7QdTyP7_dKpcuvay)

### 🛒 Enable CartPops

Now you’ll have to Enable the CarPops for the “Ajax-based Cart Popup Drawer” and the Cart Icon in the Menu. Just click on the Enable CartPops toggle and Save the Changes. Once It’s enabled and working, you can play around with the Settings and get the most out of this plugin.

![](/files/-MgR7QdStU__rr3H8gu_)

### ♥️ Wishlist Settings

Now we’ll have to Import the Wishlist Settings. For that, look in the Supplementary Files in your Computer for the “Molti Ecommerce – Wishlist Settings” and then go to MC Wishlist -> Global -> Functions -> Import & Export Settings and in the Import Section upload that file and click on the Import Button.

If you’re unable to Upload JSON file, please follow this guide: <https://samarj.com/enable-any-file-type-uploads/>

{% hint style="info" %}
For **Divi Marketplace users**, please go to your Elegant Themes account and download Supplementary Files for Molti Ecommerce and in that file you'll find the "Molti Ecommerce – Wishlist Settings.Json" file.
{% endhint %}

![](/files/fmTrAOKEDRjtDpWSxvNN)

### 🧤Filter Settings

Filter Settings are Important for the Shop Page, you can import the ones provided with the Child Theme or you can create your own in Product Filters -> Add New.

If you want to use the one that comes with the Child Theme, go to Dashboard -> Product Filters -> Import and you'll see a Popup, in the Popup click the Import Button and choose the Product Filters File from the Supplementary Folder in the Downloaded Child Theme files. Ans then the Filters will be Imported to your site.

{% hint style="info" %}
For **Divi Marketplace users**, please go to your Elegant Themes account and download Supplementary Files for Molti Ecommerce and in that file you'll find the Product Filters.Json file.

If you've **purchased from our Official site**, then It's included in the Downloaded Product file, look for the "Supplementary Files" folder.
{% endhint %}

![](/files/1P0gcVpZdSrEUO2LviAt)

### 🐶 Woo Shortcodes Kit Settings

{% hint style="danger" %}
Woo Shortcode Kit plugin is not included in the Molti Ecommerce Child Theme from v1.0.8 due to the plugin not being free anymore. You'll have to pay $1/month to get the plugin and updates from the Official site here: [**https://disespubli.com/producto/wshk/**](https://disespubli.com/producto/wshk/)

The Plugin used to be free but due to some issues with WordPress, the plugin was removed from WP Repository and is now only available on the developer's site for $1/m.
{% endhint %}

{% hint style="success" %}
We've provided a solution for this issue as well in v1.0.8. Molti Ecommerce now provides My Account v2, If you decide not to use the Woo Shortcode kit Plugin.

You can see the demo here: [**https://molti-ecommerce.samarj.com/my-account/**](https://molti-ecommerce.samarj.com/my-account/)\
It looks pretty much the same but some missing features are only possible when using the Woo Shortcode kit plugin.
{% endhint %}

Now we’ll need to enable a few switches for Login & My Account Page to function properly. For that go to Dashboard -> WooCommerce -> WSHK and open up the toggle where it says “Account Page” and enable all the Toggles except the last one as shown in this image.

![](/files/rUXQMciDHCzPtEkSL3F0)

And now open up "User Data" Panel and here enable these switches as shown in the image.

![](/files/uzChi436RoWWe1uABREc)

### 📌 Sticky Menus Settings

The cool Scroll Effect on Molti Ecommerce [Showcase Page](https://molti-ecommerce.samarj.com/) was built with the help of Sticky Menus Plugin and you need to make these changes for that Scroll Effect to work on your site as well. Please make the changes as shown in the Images below:

![](/files/suEDKxyZ3VM4Yf8JncC1)

![](/files/PKGx4ExQYb3LCKnyqglD)

And that’s It, now your Molti Ecommerce site is Functioning & Working Perfectly.&#x20;

### 🔐 Reset Password Settings

For Reset Password to work correctly, you'll need to select the Reset Password page from the Plugin's settings, simply go to Dashboard -> Settings -> Frontend Reset Password and here select the Reset Password Page.

![](/files/oiKLNPfS71kOl9p93e7g)

You can also customize other stuff like Customize Reset Password Email and many other customizations.

### 👤 Account Page Setup

Molti Ecommerce now provides 2 different My Account pages. One is built using Woo Shortcode Kit plugin and the other is built using the My Account shortcode by WooCommerce. You can decide which one you'd like to use.&#x20;

Once decided, you can go to Dashboard -> WooCommerce -> Settings -> Advanced, and here select the My Account page you'd like to use.

<figure><img src="/files/qSddHxtObaTKKUEmCAaS" alt=""><figcaption></figcaption></figure>

### 👀 Login/Register Form Setup

After importing the demo content, the register form might not show at first. You'll need to change a few settings to show the Register form.

For that, go to Dashboard -> WooCommerce -> Settings -> Account & Privacy and here check the option "Allow customers to create an account on the "My account" page" and Save settings.

<figure><img src="/files/UElgh0VUKY2PWfiB4QUO" alt=""><figcaption></figcaption></figure>

Then, also make sure User Registration is enabled in your WordPress settings:

<figure><img src="/files/PjPnKdPV6rcPgfu2a8fS" alt=""><figcaption></figcaption></figure>


# Change Color Scheme

Want to change the color scheme of your site built using the [Molti Ecommerce](https://samarj.com/molti-ecommerce) Child Theme? This guide will help you do so in 2 simple steps!

{% hint style="info" %}
**Important**: This Guide Has Been Updated!
{% endhint %}

### Step 1. Change the Buttons Color from the Preset <a href="#id-0-toc-title" id="id-0-toc-title"></a>

Open any page using the Visual Builder and open the Button Module settings, then click on the Preset link below the Module Name in the Modal. Then, Edit the “Main Gradient Button” Preset Styles. The Modal will flip, then open the Design tab -> Button -> Button Background -> and here edit the Gradient Color or add your own solid color by removing the Gradient Color.

{% embed url="<https://cln.sh/6QTnTWjM>" %}

### Step 2. Change Color from Theme Customizer <a href="#id-3-toc-title" id="id-3-toc-title"></a>

* Now you can easily change the **Accent Color/Color Scheme** of Molti Ecommerce in One Click. Simply go to Customizer -> Molti Ecommerce -> Molti Ecommerce Accent Colors and here you can Change the Color to your Brand Color. And It will change the Colors on your whole site in one click. &#x20;
* You'll also see the option to change the **Top Bar** color here that appears above the Header.
* **Secondly**, go to Appearance -> Customizer -> Buttons, and here Change Background Color for "Button Style" and "Button Hover Style".&#x20;
* **Thirdly**, go to Appearance -> Customizer and then go to General -> Typography -> and change Body Link Color.

<div><figure><img src="/files/VdW5l7HZzkD3DLkTWDaK" alt=""><figcaption><p>*Customizer -> Molti Ecommerce</p></figcaption></figure> <figure><img src="/files/1KYZCqIA4vQZnF60jzAU" alt=""><figcaption><p>Customizer -> Buttons -> Button Style</p></figcaption></figure> <figure><img src="/files/GE6b1aal0sHjGDzRVhGR" alt=""><figcaption><p>Customizer -> Buttons -> Button Hover Style</p></figcaption></figure></div>

<figure><img src="/files/9Mf9yPxguqIKbJjym4vQ" alt=""><figcaption><p>Customizer -> General Settings -> Typography</p></figcaption></figure>

{% hint style="info" %}
If you see that some colors are still orange, that's probably because they can be changed from within the Module Settings by enabling Divi Builder on the Page.
{% endhint %}


# Theme Customization

Molti Ecommerce offers numerous impressive features. Below, we provide simple video guidance on how to make various changes. You can utilize the Search Feature at the top for ease.

So you’ve purchased the Molti Ecommerce Child Theme? You’ve made one of the best decisions in your life. In this guide, we’ll see how you can customize the Molti  Ecommerce Child Theme to make sure the Molti Ecommerce is your very own website.

{% hint style="info" %}
**Star Here 👇**
{% endhint %}

## How to Change Header and Footer

### Change Header

Molti Ecommerce Comes with 6 different and cool-looking Header Designs to choose from. So If you’d like to change to any of the other designs for your Main Header. First, go to Dashboard -> Pages and search for “Header Designs” and Edit with Divi Builder. Once you’re in the Divi Builder, copy the Header section you’d like to use and then come to Divi -> Theme Builder -> Edit Global Header and paste the Section here. That’s it.

{% embed url="<https://streamable.com/lr0dvl>" %}

### Change Footer

Molti Ecommerce Theme also provides you 6 awesome-looking Footer Designs to choose from. The process is pretty much the same as you’ll do to change the Header Design. Go to Dashboard -> Pages and search for “Footer Designs” and Edit with Divi Builder. Once you’re in the Divi Builder, copy the Footer section you’d like to use and then come to Divi -> Theme Builder -> Edit Global Footer and paste the Section here. Said you, It’s pretty much the same process!

{% embed url="<https://streamable.com/6izgfs>" %}

## Change Testimonial Images

Want to change those Testimonial Images on the Business Homepage of the Molti Ecommerce Theme? Then this will help you with that. For that, please go to Appearance -> Theme Editor and then Select Molti Theme and then select style.css file. And then scroll to the line 330 and from there you’ll be able to change the Images easily. You’ll have to change the Image URLs on line 334 for the first Image and so on. As in this image.

![](/files/-MgV4fQtSfyjGr7Vg4wR)

## Make Divi Header Sticky on Scroll

You can easily make your Molti Ecommerce Header Sticky on Scroll. For that, go to Divi -> Theme Builder -> Edit Global Header, and open the Section/Row Settings that you want to make sticky on Scroll. In the Settings go to Advanced Tab -> Scroll Effects -> Sticky Position -> Stick to Top. Then Save the Changes and check your Header on Frontend.

![](/files/-MgV4fvU7JttERz-X97n)

## Edit Advance Dropdown Content

If you want to customize the Advance Dropdown Content, go to Dashboard -> Divi -> Theme Builder -> Edit Global Header and here Enable the Layers View and look for "Molti - Dropdown 2" Section and you can expand the Layers View to edit the content of Dropdown.

{% embed url="<https://cln.sh/1B94ZY9y>" %}

## Change Features Section Hover Icon Color

On the Homepage Feature Section, you see Icon Hover Effect and to change their color you can follow the screenshot below.

![](/files/TPg281f9PN1Qrq6AqUtC)

## Services Card Hover Color

The Services Cards shown on the Services Page looks really cool with an awesome hover effect. But here's how to change the color of that card. Go to the Row settings -> Column Settings -> Advanced tab -> Custom CSS -> Before and here change the color code. This video will help:

{% embed url="<https://streamable.com/0oz1a9>" %}

## Don't want to use WooCommerce? Or Getting Critical Error?

If you've decided not to use WooCommerce like many of our customers, then you need to do a small tweak. If you deactivate WooCommerce, you'll get a <mark style="background-color:red;">"Critical Error"</mark> message on your site. To fix this critical error message go to Appearance -> Theme Editor -> Molti Ecommerce -> functions.php and remove code from line 39 to 50 and the <mark style="background-color:red;">"Critial Error"</mark> issue will be gone forever.

![](/files/4Am7Y0xOX5JDKN60UxfM)

## Change /Customize the "New" Badge in Menu

Do you want to change the text in the "New" indicator Badge in the Menu or change the Background color and more? For that, go to Dashboard -> Appearance -> Theme Editor -> select Molti - Ecommerce -> Go to style.css and search for "new symbol," and you'll see the CSS for the New indicator. You can see the screenshot below to learn how to customize things:

![](/files/UYyA7H4aWaAFEi8LC0oQ)

### Add or Remove the "New Badge" from the Menu Item.

To add the New Indicator to any Menu Item you wish, you need to add Class to the Menu Item.

{% hint style="info" %}
To see the "CSS Classes" option for menu items, click "Screen Options" at the top and check the "CSS Classes" options.
{% endhint %}

* For Main Item = **molti-new-icon main**
* For Sub Menu Item = **molti-new-icon**

If you want to remove the Badge from the Menu Item, remove the Class from that Menu Item.

![](/files/MAAbuY9unnMmAxkavVdc)

## Change My Account Sidebar Background

You might be struggling a bit with changing the My Account sidebar background color. But It's not that difficult. Simply Open up the Layers View and Open the Orange Section settings -> Background -> Column 1 Background and change the color here. See this image:

![](/files/LsbnCaz3PEesUpZk0Fw3)

## Change Texts for Translation Purpose&#x20;

If you're going to Translate your site to some other language, you might want to change these texts from the Theme's Style.css.

* **Change Text on line 1111 -> "View Details" ->** Changes Text on Portfolio Module.
* **Change Text on line 1350 -> "Quick View" ->** Changes Text on Shop Module.
* **Change Text on line 1819 -> "Remove" ->** Changes Text on Cart page Remove Icon.
* **Change Text on line 2107 -> "Review Content" ->** Reviews under My Account area.
* **Change Text on line 2310 -> "Remove" ->** Changes Text on Wishlist page Remove Icon.
* **Change Text on line 2666 -> "New" ->** Changes Text on Menu Item with New Indicator.
* **Change Text on Line 2868 -> "Navigate" ->** Changes Text on My Account V2 Page.

Another can be changed by going to the functions.php file and here go to line 614 and changing the text "View Review" to your own text.

<figure><img src="/files/WpTHkQg8yG6UAEaRwYyD" alt=""><figcaption></figcaption></figure>

## Redirect to My Account Page after Login

If you want to redirect your customer to the My Account page after login, here's what you can do to achieve this, See this quick video for better understanding.

{% embed url="<https://cln.sh/25bowi>" %}

## How to Edit Login Area

In the latest update, you can now find the Login area and My Account area on the Account Page. Here's a video for help.

{% embed url="<https://cln.sh/WZj4y9>" %}

## Make Products 2 Column in Mobile

If you feel the need to make the Products to show in 2 columns on Mobile, then don't worry, you can do that easily. You just need to make a small CSS change for that, simply go to Dashboard -> Appearance -> Theme File Editor -> Style.css, and here make these changes on lines 2762 and 2763:

* Change Width to 50%
* Margin to 0%

<figure><img src="/files/NKIG8dhP9lPlCQYMKkAf" alt=""><figcaption></figcaption></figure>

## Changing the Images-Based Testimonials Content

This is the Testimonial section that you'll find on the Services page, and here's a video to help you edit the content of all 4 Testimonials in this design:

{% embed url="<https://cln.sh/XJrQm5BR>" %}

## Change the  Divider Line Color on Homepage

Changing the divider line that shows next to some Headings on the homepage is quite easy, you simply need to open up the Module settings and change the Box Shadow color; here's a video for help:

{% embed url="<https://cln.sh/DlFgzu>" %}

## Editing the Search Dropdown on the Main Header

Editing the Search Dropdown is easy; it's just a little bit hidden but can be easily accessed using Divi's Layers View.&#x20;

Simply click on the Layers View Icon and search for **"Search Form",** then you'll see the Row for the Search Form. Simply edit this Row and remove the class from this Row to see it inside the Builder to make your changes. Once done, add the class back so it remains hidden on the front end.

**Video walkthrough:**

{% embed url="<https://cln.sh/SdDNqBqY>" %}


# Changelog

👉 1.2.1 - Apr 28, 2026

Improvements to the Demo Importer:

* Fixed an issue where plugins wouldn’t activate in some cases.
* Plugins are now installed directly from the WordPress repository.

***

👉 1.2 - Apr 16, 2026

* **New – Now fully compatible with Divi 5.**
* New – All-new demo importer, now faster and more reliable than before.
* New – Added **7 new pages** from the Molti Business version, now available in Molti Ecommerce.
* Improved – Updated to use Divi 5’s latest features and improved performance.
* Fixed – Multiple bug fixes and stability improvements.

***

👉 1.1.2 - Sep 25, 2024 **(Important Update)**

* Moved to a Better & Much Advanced Wishlist Plugin with Mini Wishlist support in the Header and more.
* Improved My Account V1 Tabs - Now the relative tabs stay open on page reload (Most Requested)
* Improved Product Page Design
* Improved Shop Page Design
* Improved Product Card Design
* Improved Shop Homepage Design
* Improved Search Bar Design
* And fixed many small little bugs & Improved in other areas.

***

👉 1.1.1 - Mar 23, 2024

Compatibility Update for Latest WordPress & Divi Version.

***

👉 1.1 - Mar 22, 2023

* **New** - Moved to a new Demo Content Importer for Molti Ecommerce (Reliable and Faster)
* Enhanced - Color Changer Feature
* Fix - Sub Sub Menu was not working correctly
* Fix - Account Page Responsive Issues
* Other Small Fixes

***

👉 1.0.9 - Jan 30, 2023

* **New** - Added Option to Change the Color Scheme in One Click under the Theme Customizer.
* Fixed - Stripe Payment Field not showing correctly

<img src="https://cloud.headwayapp.co/changelogs_images/images/big/000/102/331-9fd0d044db0a699031250faa2b7360db45bec8c9.png" alt="2023-01-30 at 20.33.32.png" height="559.29" width="313.6">

***

👉 1.0.8 - Jan 16, 2023

* **New** - Added Simple My Account Page using Woo My Account Shortcode
* Added - Mobile Menu Scroll
* Added - Image for Each Product on the List on the Checkout Page
* Enhanced - Coming Soon Page

***

👉 1.0.7 - Jul 23, 2022

* **New**- Rebuild the Product Search Result Page - Now you'll see Products on Search Result Page
* Added - Script to fix the Flash of Unstyled Content
* Improved - Main Header for Responsiveness
* Fixed - Social Icons not clickable Team Card
* Fixed - Issue with Tabs on Single Post & Single Job Page

***

👉 1.0.6 - Apr 03, 2022

* Replaced - Shop Module with Related Products on Product Page
* Fixed - Issue with Mega Menu
* Fixed - Avatar Photo in My Account
* Fixed - Login/Account link in Header
* Fixed - Content Switcher not working due to Latest Divi Update
* Fixed - Gradient Color Transparent on Hover - Happening due to Latest Divi Gradient Update
* Fixed - Strange Numbers in My Account

And Other Small Little Bug Fixes & Enhancements!

***

👉 1.0.5 - Jan 07, 2022

* Enhanced - My Account Experience.
* Enhanced - Login / Register Experience.
* Improved - Shop Module Sale Badge.
* Fixed - Blog Module Offset number to 0 from 1 (which causes the latest post to disappear)

***

👉 1.0.4 - Dec 26, 2021

* **New** - Rebuilt the Cart Page with New Divi Woo Cart Modules.
* Enhanced - Divi Shop Module for better Experience & Responsiveness.
* Included - Product Filter Import File.

***

👉 1.0.3 - Oct 9, 2021

* Fixed - Wishlist and login button height issue on the Header (style 9-10).
* Fixed - Image Scroll animation on showcase page on big screens.
* Fixed - Missing Classes for Header on the Header Design page (style 9-10).
* Fixed - Dropdown Header not available on Header Designs page (for style 9-10).
* Fixed - Search Results going below the Search dropdown.

***

👉 1.0.2 - Aug 18, 2021

* Enhanced Working of Advanced Dropdown Menu, Search Dropdown, etc.
* **Ability to Import Presets with Demo Import - Saves you time!**
* Fixed Category Carousel on Shop Homepage
* Updated Conflicting Image File Name - Payment Methods in Footer.

***

👉 1.0.1 - Aug 7, 2021

* Fixed Missing CSS in style.css.

***

👉 1.0 - July 21, 2021

* The initial release of Molti Ecommerce.


# Molti LMS

<figure><img src="/files/NHm99pGnRh0b2JSDtUwY" alt=""><figcaption></figcaption></figure>

In order to install the [**Molti LMS**](https://samarj.com/molti-lms) Child theme, you must first purchase the [Elegant themes Membership](https://www.elegantthemes.com/affiliates/idevaffiliate.php?id=56146\&url=55671) and Download [Divi theme](https://www.elegantthemes.com/affiliates/idevaffiliate.php?id=56146\&url=55671).

Molti is fully compatible with Divi v4.20+, just make sure that you’ve installed the latest version of the Divi theme. Some features may not work correctly if the Divi theme version is less than v4.20.

### **Requirements**

* Divi Theme
* LearnDash
* Fresh Installation of WordPress (Recommended)

### Server Recommended Requirements

* upload\_max\_filesize (512M or more)
* max\_input\_time (300 or more)
* memory\_limit (512M or more)
* max\_execution\_time (1000 or more)
* post\_max\_size (512M)

{% hint style="info" %}
These are just recommended values. If you've got a Congrats Message in your Divi -> Support Center, then you're good to go; please Contact your hosting support and ask them to increase these values if you don't have a Congrats message in Divi Support Center.
{% endhint %}


# Installing the Child Theme

Once you’ve downloaded the Child Theme you'll get a file named "molti-lms.zip" that you need to work with.

<figure><img src="/files/vYvTxZhRH94BLscwPYbD" alt=""><figcaption></figcaption></figure>

Now go to your WordPress Dashboard and go to Appearance -> Themes and here click the "Add New" button at the top.

![](/files/xlBIPutEM2lzsxkcieoj)

Now click on the Upload Theme button at the top and then upload the “molti-lms.zip” here and click on the Install Now button.

![](/files/HJgyQFWtrWFZMdcgmoQT)

After that click on the "Activate" Button to activate the Molti LMS Theme.

![](/files/L9jgQOMIPcxCDkQ0iihj)

With that, It will install the Molti Theme on your site.

<figure><img src="/files/masnN9mML5SizkI3iivD" alt=""><figcaption></figcaption></figure>

Now click the below button to see how to Import Demo Content.

{% content-ref url="/pages/7lGlEmiZb2CZnCOEhayA" %}
[Importing Demo Content](/molti-lms/importing-demo-content)
{% endcontent-ref %}


# Importing Demo Content

{% hint style="info" %}
**Important:** Before you go and Import Demo Content, first make sure you've installed <mark style="background-color:blue;">LearnDash Plugin</mark> and the <mark style="background-color:blue;">LearnDash Course Grid Addon</mark>. If you import demo content without installing these 2 plugins, It may create issues.&#x20;
{% endhint %}

After Installing the Molti LMS theme on your site, you'll now see a new Menu Item in your WordPress admin, simply click on it.

And then on this page, you'll see all the Molti LMS Import Options. You can uncheck things If you don't want to import something. But If you're installing on a Fresh Website, make sure all the options are checked and then hit the "Import Demo Content" button.

![](/files/CzliUQlDfGUJOt0VFtcE)

The Import process could take some time here depending on your internet connection, so you don’t need to worry about that.&#x20;

After the Import is complete you’ll see a message like this. You can hit "Remove Demo Content & Import Functions" to remove the Import function from your site, since it's needed anymore.

![](/files/M0rxbEcEEWVjoEOBtis0)

And that’s it. That’s how easy It was to Import the Molti LMS Demo Content with this all-new Demo Content Importer.

{% hint style="info" %}
If you’re facing any issues with the Import Process, Please [**Send Us a Message**](https://samarj.com/contact) & we’ll try our best to help you out.
{% endhint %}

### 🛠️ Fixing Common Import Issues

Here are quick fixes to some of the most common import issues.

{% tabs %}
{% tab title="Issue #1 - Solution" %}
Let's discuss the #1 issue that we face most of the time, and that is it's only showing "WP Import Options" or just an empty space in the Import area.&#x20;

Thankfully, there's a quick fix for that: go to the Support Menu of the Theme Import options and click the **Reset Button** at the botto&#x6D;**.**

Now, you'll need to set the **Batch size**. We recommend you set it to 10.

<figure><img src="/files/f6Wnk1xPOaHMCovhsNVN" alt=""><figcaption></figcaption></figure>
{% endtab %}

{% tab title="Issue #2 - Solution" %}
This one might be the strangest, and it's infrequent; sometimes, the Importer calls for the Import files from the Plugins folder instead of the Themes folder.&#x20;

To quickly fix the issue, move the Theme Folder from the "Themes" Folder to the "Plugins" Folder, and then you'll be able to import the demo content without any issues.&#x20;

Here's a video recording to help you with this process. You may speed it up.

{% embed url="<https://cln.sh/GTwj9ymM>" %}

After Importing demo content, you can delete the Theme Files from the Plugins Folder.
{% endtab %}

{% tab title="Issue #3 - Solution" %}
This is also a very rare one, and mostly Flywheel users have this issue. If you've enabled **Password Protection** on your site, you may need to disable it to be able to import the demo content.
{% endtab %}
{% endtabs %}


# Important Settings

Once you’re done with Installation & Importing Demo Content. You’ll have to make these changes to make sure everything is perfect.

### 🔎 Permalink

Go to Settings -> Permalinks and change Permalink to “Post Name” and Save the Changes.

![](/files/-MgV0hLb_UF4zuN_Frtn)

To avoid any issues, It's recommended to change the permalink to Post Name!

### 🔑 Enable User Registration

For users to be able to create an account on your site, you'll need to enable "Anyone Can Register" under Dashboard -> Settings -> General.

<figure><img src="/files/nMMm39uqWFp6kHmJPaUY" alt=""><figcaption></figcaption></figure>

### 🎓 LearnDash Settings

You'll have to make a few changes and adjustments in the LearnDash settings so that everything works correctly. Simply go to Dashboard -> LearnDash LMS -> Settings and here make these changes:

* Change the Colors to your brand colors.
* Enable "Focus Mode".
* Enable "Login & Registration".
* And Upload your Logo.

<figure><img src="/files/luWdJgItq4PVq8vuWHs8" alt=""><figcaption></figcaption></figure>

### 💵 Currency Setup

Go to the Payments tab in LearnDash settings and here change the Currency to your preferred one.

<figure><img src="/files/TLWehqvTBaiBI5TxwllD" alt=""><figcaption></figcaption></figure>

{% hint style="info" %}
And In the Payments Tab, you can also set up the Payment Gateway, that you'd like to use.
{% endhint %}


# Change Color Scheme

Want to change the color scheme of your site built using the [**Molti LMS** ](https://samarj.com/molti-lms)Child Theme? This guide will help you do so in 2 simple steps!

{% hint style="info" %}
**Important**: This Guide Has Been Updated!
{% endhint %}

### Step 1. Change the Buttons Color from the Preset <a href="#id-0-toc-title" id="id-0-toc-title"></a>

Open any page using the Visual Builder and open the button Module settings, then click on the Preset link below the Module Name in the Modal. And then Edit the “Main Gradient Button” Preset Styles. The Modal will flip, then open the Design tab -> Button -> Button Background -> and here edit the Gradient Color or add your own solid color by removing the Gradient Color.

{% embed url="<https://share.vidyard.com/watch/gSFWp5TTKRbrWEk4T3kECh>?" %}

### Step 2. Change Color from Theme Customizer <a href="#id-3-toc-title" id="id-3-toc-title"></a>

* Now you can easily change the **Accent Color/Color Scheme** of Molti LMS in One Click. Simply go to Customizer -> Molti LMS -> Molti LMS Accent Colors and here you can Change the Color to your Brand Color. And It will change the Colors on your whole site in one click. &#x20;
* You'll also see the option to change the **Top Bar** color here that appears above the Header.
* Secondly, go to Appearance -> Customizer and then go to General -> Typography -> and change Body Link Color.

<div><figure><img src="/files/F8ivhZAW8kzDEmGvXxft" alt=""><figcaption><p>Customizer -> Molti</p></figcaption></figure> <figure><img src="/files/BD4AoKCxBDQTXTHx6VR0" alt=""><figcaption><p>Customizer -> General Settings -> Typography</p></figcaption></figure></div>

{% hint style="info" %}
If you see that some colors are still orange, that's probably because they can be changed from within the Module Settings by enabling Divi Builder on the Page.
{% endhint %}


# Theme Customization

So you’ve purchased Molti LMS Child Theme? You’ve made one of the best decisions in your life. So In this guide, we’ll see how you can customize the Molti LMS Child Theme to make sure the Molti LMS is your very own website.

## How to Change Header and Footer

### Change Header

Molti LMS Comes with 10 different and cool-looking Header Designs to choose from. So If you’d like to change to any of the other designs for your Main Header. First, go to Dashboard -> Pages and search for “Header Designs” and Edit with Divi Builder. Once you’re in the Divi Builder, copy the Header section you’d like to use and then come to Divi -> Theme Builder -> Edit Global Header and paste the Section here. That’s it.

{% embed url="<https://streamable.com/lr0dvl>" %}

### Change Footer

Molti LMS Theme also provides you 10 awesome-looking Footer Designs to choose from. The process is pretty much the same as you’ll do to change the Header Design. Go to Dashboard -> Pages and search for “Footer Designs” and Edit with Divi Builder. Once you’re in the Divi Builder, copy the Footer section you’d like to use and then come to Divi -> Theme Builder -> Edit Global Footer and paste the Section here. Said you, It’s pretty much the same process!

{% embed url="<https://streamable.com/6izgfs>" %}

## Change Testimonial Images

Want to change those Testimonial Images on the Homepage of the Molti LMS Theme? Then this will help you with that. For that, please go to Appearance -> Theme Editor and then Select Molti LMS Theme and then select style.css file. And then scroll to line 330 and from there you’ll be able to change the Images easily. You’ll have to change the Image URLs on line 334 for the first Image and so on. As in this image.

![](/files/-MgV4fQtSfyjGr7Vg4wR)

## Make Divi Header Sticky on Scroll

You can easily make your Molti LMS Header Sticky on Scroll. For that, go to Divi -> Theme Builder -> Edit Global Header, and open the Section/Row Settings that you want to make sticky on Scroll. In the Settings go to Advanced Tab -> Scroll Effects -> Sticky Position -> Stick to Top. Then Save the Changes and check your Header on Frontend.

![](/files/-MgV4fvU7JttERz-X97n)

## Change Features Section Hover Icon Color

On the Homepage Feature Section, you see Icon Hover Effect and to change their color you can follow the screenshot below.

![](/files/TPg281f9PN1Qrq6AqUtC)

## Services Card Hover Color

The Services Cards shown on the Services Page looks really cool with an awesome hover effect. But here's how to change the color of that card. Go to the Row settings -> Column Settings -> Advanced tab -> Custom CSS -> Before and here change the color code. This video will help:

{% embed url="<https://streamable.com/0oz1a9>" %}

## Edit Advance Dropdown Menu

If you want to customize the Advance Dropdown Content, go to Dashboard -> Divi -> Theme Builder -> Edit Global Header and here Enable the Layers View and look for the 3rd Section. You can expand the Layers View to edit the content of Dropdown.

Video Walkthrough:

{% embed url="<https://cln.sh/xq0vKmCR>" %}

## Change /Customize the "New" Text in Menu

Want to change the test in the "New" indicator in the Menu or change the Background color? For that go to Dashboard -> Appearance -> Theme Editor -> select Molti LMS -> Go to style.css and search for "new symbol" and you'll see the CSS for the New indicator. You can see the screenshot below to know how to customize things:

![](/files/UYyA7H4aWaAFEi8LC0oQ)

To add the New Indicator to any Menu Item you wish you need to add Class to the Menu Item.

* For Main Item = molti-new-icon main
* For Sub Menu Item = molti-new-icon

![](/files/MAAbuY9unnMmAxkavVdc)


# Installation Video

Complete Step-by-Step Guide on How to Use Molti LMS

Watch the Video below if you don't like going through Documentation and in this video, we'll cover everything you need to sell your Amazing Courses:&#x20;

{% embed url="<https://youtu.be/xGuTMjHSJi0>" %}


# Changelog

👉 1.1 - Apr 25, 2026

• **New – Now fully compatible with Divi 5.**\
• New – All-new demo importer, now faster and more reliable than before.\
• New – Added **7 new pages** from the Molti Business version, now available in Molti LMS.\
• Improved – Updated to use Divi 5’s latest features and improved performance.\
• Fixed – Multiple bug fixes and stability improvements.

***

👉 1.0 - March 9, 2023

The initial release of Molti LMS.


# Supreme Store

<figure><img src="/files/rTatorWsXtm4a9PUmZIA" alt=""><figcaption></figcaption></figure>

In order to install the [**Supreme Store**](https://samarj.com/supreme-store/) Child theme, you must first purchase the [Elegant themes Membership](https://www.elegantthemes.com/affiliates/idevaffiliate.php?id=56146\&url=55671) and Download the [Divi theme](https://www.elegantthemes.com/affiliates/idevaffiliate.php?id=56146\&url=55671).

Molti is fully compatible with Divi v4.9+, just make sure that you’ve installed the latest version of the Divi theme. Some features may not work correctly if the Divi theme version is less than v4.9.

### **Requirements**

* Divi Theme
* Fresh Installation of WordPress (Recommended)

### Server Requirements

* upload\_max\_filesize (512M or more)
* max\_input\_time (300 or more)
* memory\_limit (512M or more)
* max\_execution\_time (1000 or more)
* post\_max\_size (512M)

{% hint style="info" %}
These are just recommended values, if you've got a Congrats Message in your Divi -> Support Center then you're good to go, Please Contact your hosting support and ask them to increase these values If you don't have a Congrats message in Divi Support Center.
{% endhint %}


# Installing the Child Theme

This guide will talk you through the Installation process of the "Supreme Store" Child Theme for Divi.

### Step 1. Download the Package

So the first step is to download the package and extract it to your computer.

{% hint style="info" %}
You don't need to extract the file If you've downloaded it from **Marketplace.**
{% endhint %}

<figure><img src="/files/LR0nlKvFy0MnYtCgHPws" alt=""><figcaption></figcaption></figure>

### Step 2. Install the Demo Importer Plugin

You need to install the demo importer plugin for Supreme Store by going to Dashboard -> Plugins -> Add New.

<figure><img src="/files/f1MRe5xbo0thmUF6iK1v" alt=""><figcaption></figcaption></figure>

Now on the next screen click the "Upload" button at the top and then upload the "supreme-store.zip" file from the package you've extracted. Then click the Install now button.

{% hint style="info" %}
If you downloaded from Marketplace, simply upload the main downloaded file here.
{% endhint %}

<figure><img src="/files/2dhdADUi0fNaA7KMfKBe" alt=""><figcaption></figcaption></figure>

Once Installed, It will ask you to Activate it as well. So all you need to do is Activate it.

<figure><img src="/files/CNfcwTvwTJKHpcl1zGK3" alt=""><figcaption></figcaption></figure>

So now you're done with the Installation Process. Head to the Demo Import Process!


# Importing Demo Content

After installing, you'll see "Supreme Store" on the Left Sidebar. Simply click on It and then on the next screen scroll all the way down and click the Import button.

<figure><img src="/files/MRASKBl3wYZYMDhpzA5K" alt=""><figcaption></figcaption></figure>

After that, the Import process will begin and It will take some time here. So you need to have some patience! After done, you'll see this message.

<figure><img src="/files/YfyB5306NCJ3ykuqaRml" alt=""><figcaption></figcaption></figure>

That's It, you've successfully Imported the demo content. Now all you need to do is make a few changes as explained in the next guide.


# Important Changes

Once you're done with Installation & Demo Import Process. You need to make the below 2 changes, to make sure everything is perfect.

So now, you'll have to look into the Extracted package and look for the "Supplementary" Zip file, you need to extract it.

{% hint style="info" %}
If you've purchased from Divi Marketplace, please look for the "Supplementary Download" button for Supreme Store in your Marketplace Account area.
{% endhint %}

And you'll need to get these 2 files.

<figure><img src="/files/mh6U0aHxyVr1IJB7TCVI" alt=""><figcaption></figcaption></figure>

### Wishlist Settings

So first off, we need to Import Wishlist Settings. For that, go to Dashboard -> TI Wishlist -> Export/Import Settings and then go to Import area and here upload the "Settings for Wishlist - Supreme Store.json" and click the Import button.

<figure><img src="/files/0WERMjXF2nHtg8ZJUVDy" alt=""><figcaption></figcaption></figure>

### Product Filters Settings

Next, we need to Import Product Filters Settings. For this, go to Dashboard -> Product Filters and click the Import button at the top and then you'll see a Popup. Click the "Import" button and then choose the "Product Filters - Supreme Store.json" file and It will import product filters.

<figure><img src="/files/itJoGfKxkfBmrlDTJYP3" alt=""><figcaption></figcaption></figure>

#### And That's It you're good to go 🥳


# Changelog

👉 1.1

* **New – Now fully compatible with Divi 5.**
* New – All-new demo importer, now faster and more reliable than before.
* Improved – Updated to use Divi 5’s latest features and improved performance.
* Fixed – Multiple bug fixes and stability improvements.

***

👉 1.0

* The initial release of Florence.


# Florence

![](/files/3Mxy9hlvJlObyxzlJGuD)

In order to install the [Florence](https://samarj.com/florence) Child theme, you must first Purchase the [Elegant themes Membership](https://www.elegantthemes.com/affiliates/idevaffiliate.php?id=56146\&url=55671) and Download [Divi theme](https://www.elegantthemes.com/affiliates/idevaffiliate.php?id=56146\&url=55671).

Florence is fully compatible with Divi v4.14+, just make sure that you’ve installed the latest version of the Divi theme. Some features may not work correctly if the Divi theme version is less than v4.14.

### **Requirements**

* Divi Theme
* Fresh Installation of WordPress (Recommended)
* WooCommerce

### Server Recommended Requirements

* upload\_max\_filesize (512M or more)
* max\_input\_time (300 or more)
* memory\_limit (512M or more)
* max\_execution\_time (1000 or more)
* post\_max\_size (512M)

{% hint style="info" %}
These are just recommended values. If you've got a Congrats Message in your Divi -> Support Center, then you're good to go; please Contact your hosting support and ask them to increase these values if you don't have a Congrats message in Divi Support Center.
{% endhint %}


# Installing the Child Theme

Once you’ve downloaded the Child Theme you'll get a file named "florence.zip" that you need to work with.

<figure><img src="/files/FvdHKQduL8YDrXBVxmjG" alt=""><figcaption></figcaption></figure>

Now go to your WordPress Dashboard and go to Appearance -> Themes and here click the "Add New" button at the top.

![](/files/hcfymoBSiZswa8ZjDIcb)

Now click on the Upload Theme button at the top and then upload the “florence .zip” here and click on the Install Now button.

![](/files/uI0ls1gwunQD3Y8w0cCK)

After that click on the "Activate" Button to activate the Florence Theme.

![](/files/Ji9F20WaxxuJtBOfJj2v)

With that, It will install the Florence Theme on your site.

<figure><img src="/files/qUvPW2g4kji06yVs7jCK" alt=""><figcaption></figcaption></figure>

Now click the below button to see how to Import Demo Content.

{% content-ref url="/pages/qYdrwkBlhMadZkf4k2tD" %}
[Importing Demo Content](/florence/importing-demo-content)
{% endcontent-ref %}


# Importing Demo Content

After Installing the Florence theme on your site, you'll now see a new Menu Item in your WordPress admin, simply click on it.

And then on this page, you'll see all the Florence Import Options. You can uncheck things If you don't want to import something. But If you're installing on a Fresh Website, make sure all the options are checked and then hit the "Import Demo Content" button.

![](/files/GJ3rKbaTMNrDg57MwLzS)

The Import process could take some time here depending on your internet connection, so you don’t need to worry about that.&#x20;

After the Import is complete you’ll see a message like this. You can hit "Remove Demo Content & Import Functions" to remove the Import function from your site since it's needed anymore.

<figure><img src="/files/jYmz3GPyj1tTbPSsWuiE" alt=""><figcaption></figcaption></figure>

And that’s it. That’s how easy It was to Import the Florence Demo Content with this all-new Demo Content Importer.

{% hint style="info" %}
If you’re facing any issues with the Import Process, Please [**Send Us a Message**](https://samarj.com/contact) & we’ll try our best to help you out.
{% endhint %}


# Important Changes

Once you’re done with Installation & Importing Demo Content. You’ll have to make these changes to make sure everything is perfect.

### 🔎 Permalink

Go to Settings -> Permalinks and change Permalink to “Post Name” and Save the Changes.

![](/files/-MgV0hLb_UF4zuN_Frtn)

To avoid any issues, It's recommended to change the permalink to Post Name!


# Change Color Scheme

Want to change the color scheme of your site built using the [Florence](https://samarj.com/florence) Child Theme? This guide will help you do so.

### Change Buttons Color from Preset <a href="#id-0-toc-title" id="id-0-toc-title"></a>

Open any page using the Visual Builder and open the button Module settings, then click on the Preset link below the Module Name in the Modal. And then Edit the “Main Button - Florence” Preset Styles. The Modal will flip, then open the Design tab -> Button -> Button Background -> and here edit the Background Color. See Video Walkthrough!

{% embed url="<https://cln.sh/Gd4jOa>" %}

### Using Divi’s Find & Replace <a href="#id-1-toc-title" id="id-1-toc-title"></a>

To Change Every Element’s Color on your page, you can use Divi’s Find & Replace. First Enable the Divi Builder on the page you want and then open any Module settings that have the Florence Main Color, then right-click on the Color code and choose Find & Replace. Then simply add your color and make sure to select the Checkbox that says “Replace All” then click the “Replace” button below to change all the Florence colors to the one you did. See Video Walkthrough!

{% embed url="<https://cln.sh/ESrUAX>" %}

### Change Color from Style.css <a href="#id-3-toc-title" id="id-3-toc-title"></a>

You’ll also have to change the Florence Color code to your Color code from the Theme’s Style.css File. For this, go to Appearance -> Theme File Editor and there press CTRL + F to search for color code. In that bar, search for #08415c and replace this color with your Brand Color using any Text Editor like Sublime.

Simply copy the whole code and paste it to the Code Editor (i.e Sublime) and replace the Color codes and put all the code back in the style.css.

### Change Color from Theme Customizer <a href="#id-3-toc-title" id="id-3-toc-title"></a>

You'll also need to change the color from Customizer. For that, go to Appearance -> Customizer and then go to General -> Typography -> and change Body Link Color.

![](/files/5ZSZtpxDnxwWOTHzhKMH)


# Changelog

👉 1.1

* **New – Now fully compatible with Divi 5.**
* New – All-new demo importer, now faster and more reliable than before.
* Improved – Updated to use Divi 5’s latest features and improved performance.
* Fixed – Multiple bug fixes and stability improvements.

***

👉 1.0.1

* New - Moved to a new Demo Content Importer for Molti (Reliable and Faster)
* Fixed - Small Little Bugs and Compatible with Divi v4.20+

***

👉 1.0

* The initial release of Florence.


# Go-On 2.0

![](/files/-MgV8FsLhbyqy3Hnw3ql)

In order to install the [**Go-On 2.0**](https://samarj.com/go-on-2.0-theme/) Child theme, you must first Purchase [Elegant themes Membership](https://www.elegantthemes.com/affiliates/idevaffiliate.php?id=56146\&url=55671) and Download [Divi theme](https://www.elegantthemes.com/affiliates/idevaffiliate.php?id=56146\&url=55671).

Go-On 2.0 is fully compatible with Divi v4.9+, just make sure that you’ve installed the latest version of the Divi theme. Some features may not work correctly if the Divi theme version is less than v4.9.

### **Requirements**

* Divi Theme
* Fresh Installation of WordPress (Recommended)
* WooCommerce

### Server Requirements

* upload\_max\_filesize (512M or more)
* max\_input\_time (300 or more)
* memory\_limit (512M or more)
* max\_execution\_time (1000 or more)
* post\_max\_size (512M)

Contact your hosting support and ask them to increase these values if possible.


# Installing the Child Theme

Once you’ve downloaded the Child Theme Package, You should then extract all the files in it to your PC. Once extracted you’ll get the “Go-On-2.0.zip” and Theme Builder Templates. To Install the Child Theme we need the “Go-On-2.0.zip” file then go ahead to your WordPress Dashboard > Appearance > Themes and then Click on Add New Button at the top.

![](/files/-MgVLGz9bRXsOIlic28Z)

Now Click on **Upload Theme** and Choose the **Go-On.zip** File from the Package and click on **Install Now** Button.

![](/files/-MgVLGz8uhvrO2TaRMk0)

Then Click on **Activate** to activate the Child Theme.

![](/files/-MgVLGz7tsLvKjiwNdMZ)

And That’s it for the Child theme Installation Process. Now click the below button to see how to Import Demo Content.

{% content-ref url="/pages/-MgV9OSaRh-xAQWIwoo1" %}
[Importing Demo Content](/go-on-2.0/importing-go-on-2.0-demo-content)
{% endcontent-ref %}


# Importing Demo Content

## 🧱 Import Theme Content

Once you’ve successfully installed and activated the child theme now you can Import the Demo data that comes with the theme.

You may have seen this Notification after the Child theme installation.

![](/files/-MgVLGz6oeIZTRtVYvrz)

You just have to click on **Begin Installing Plugins**. Now Select all plugins and Select **Install** from the Dropdown and click on **Apply** Button.

![](/files/-MgVLGz5Is1PGSIXwxu8)

Once that Done click on Return to Dashboard.

![](/files/-MgVLGz4V8R7C2LZRGw-)

Now Hover over to Appearance and click on **Import Demo Data**.

![](/files/-MgVLGz3Jz7MG03CQmCS)

Now Click on **Import Demo Data** Button to import all the Pages and Customizations etc.

![](/files/-MgVLGz2J_-L_1adhMTk)

And then on the next screen, click the Continue Button and that will start the Demo Import Process. So you'll have to wait for a few minutes here.

![](/files/-MgVLGz005EIa6uf4YXt)

When it’s done it will look like this.

![](/files/-MgVMjXxlHaI-J_4ccgu)

## 🔨  Import Theme Builder Templates

{% hint style="info" %}
Please extract the "Theme Builder Templates and Icons.zip" file which contains the Theme Builder Templates JSON file.
{% endhint %}

Once you've Imported the Theme Content, It's now time to Finish the Demo Import Process. Let's Install the Theme Builder Templates and Finish this. For that, Go to Divi -> Theme Builder, and then on the top right corner click the Portability Icon.&#x20;

![](/files/-MgVOM9fYhCFIB5rBzU_)

Now click on the **Import** button and then Choose the .JSON file from the Package you’ve downloaded and Click on **Import Divi Theme Builder Templates** Button.

![](/files/-MgVOM9earbmJRjV25Lt)

After Installing the Theme Builder Templates, make sure you click the "Save Changes" button at the top.

![](/files/-MgVOM9dMjwzl5bDK-T9)

And you’ve successfully imported all the content and customizations that came with the theme you can, even more, customize it in your own way.


# Important Settings

Once you’re done with Installation & Importing Demo Content. You’ll have to make these changes to make sure everything is perfect.

### 🔗 Permalink

Go to Settings -> Permalinks and change Permalink to “Post Name” and Save the Changes.

![](/files/-MgVQ_XA0Cc8iYWd_e56)

### 🛒 WooCommerce Settings&#x20;

In the Sidebar Hover to Woocommerce > Settings under Account and Privacy tab make sure all these options are selected and click on Save Changes.

![](/files/-MgVQ_X9FvAtgLAgbYpa)

Under the Advanced tab make sure all the pages are selected.

![](/files/-MgVQ_X8jvgNBZKePjHZ)

That’s it Woocommerce is Ready for the Go-On 2.0 Child Theme.


# Business

![](/files/-MgVSrvbvjI6A83srn61)

In order to install and use this Child theme, you must first Purchase [Elegant themes Membership](https://www.elegantthemes.com/affiliates/idevaffiliate.php?id=56146\&url=55671) and Download [Divi theme](https://www.elegantthemes.com/affiliates/idevaffiliate.php?id=56146\&url=55671).

This Child theme is fully compatible with Divi v4+ just make sure that you’ve installed the latest version of the Divi theme. Some features may not work correctly if the Divi theme version is less than v4.0.

### **Requirements**&#x20;

* Divi Theme v4+
* Fresh Installation of WordPress (Recommended)


# Installing the Child Theme

Once you’ve downloaded the Child Theme Package, Go ahead to your WordPress **Dashboard** > **Appearance** > **Themes** and click on Add New.

![](/files/-MgVT3MiFW2ypuWU05YH)

Now Click on **Upload Theme** and Choose the **.Zip** File from the Package and click on **Install Now** Button.

![](/files/-MgVT3hrSaHla8Y-b6Xq)

Then Click on **Activate** to activate the Child Theme.

![](/files/-MgVT45tRbUkbiBkHQG5)

And That’s it for the Child theme Installation Process.


# Importing Demo Content

## 🧱 Importing Theme Content

To Import Demo content you’ll first have to install the required plugin to do so.

First of all, Click on Begin Installing Plugin in Notification you’ll be having on top.

![](/files/-MgVTov52J7CVBm5QeP-)

Then click on the Install button to Install the Demo Importer Plugin.

![](/files/-MgVTov4wZRXI5M0V9lk)

As the plugin is installed and activated successfully you can now click on **Return to the Dashboard** link.

![](/files/-MgVTov3bpN15715SI4_)

Now hover over to Appearance and click on Import Demo Data.

![](/files/-MgVTov2zotHVCk02L3w)

Now click on the Import Demo Data button to import all the content, Customizations, etc.

![](/files/-MgVTov1TVu1SzUv6fxO)

Now you’ll see this kind of error but you can simply ignore this as everything was imported successfully.

![](/files/-MgVTov0KW-V6yAi5c4Q)

## 🔨 Importing Theme Builder Templates

Now Hover over to **Divi** > **Theme Builder**.

![](/files/-MgVTov-avEFxIKavnjQ)

And click on Portability Button at the top right corner.

![](/files/-MgVTouz7ibhEzdqExks)

Now click on the **Import** button and then Choose the .JSON file from the Package you’ve downloaded and Click on **Import Divi Theme Builder Templates** Button

![](/files/-MgVTouyf0azRZqGRlJN)

After the Completion of the Importing Process, you can now click on the **Save Changes** button.

![](/files/-MgVTouxnd14uOlCAYU9)

And you’ve successfully imported all the content and customizations that came with the theme you can, even more, customize it in your own way.


# Go-On

In order to install and use this Child theme, you must first Purchase [Elegant themes Membership](https://www.elegantthemes.com/affiliates/idevaffiliate.php?id=56146\&url=55671) and Download [Divi theme](https://www.elegantthemes.com/affiliates/idevaffiliate.php?id=56146\&url=55671).

This Child theme is fully compatible with Divi v4+ just make sure that you’ve installed the latest version of the Divi theme. Some features may not work correctly if the Divi theme version is less than v4.0.

### **Requirements**&#x20;

* Divi Theme v4+
* Fresh Installation of WordPress (Recommended)
* WooCommerce


# Installing the Child Theme

Once you’ve downloaded the Child Theme Package, Go ahead to your WordPress Dashboard > Appearance > Theme and click on Add New.

![](/files/-MgVVrKlgSqwqKWMrv1B)

Now Click on **Upload Theme** and Choose the **.Zip** File from the Package and click on **Install Now** Button.

![](/files/-MgVVrKkKlbk_Qy7u3Qg)

Then Click on **Activate** to activate the Child Theme.

![](/files/-MgVVrKi45Lc57aqkR3V)

And That’s it for the Child theme Installation Process.


# Importing Demo Content

* Once you’ve successfully installed and activated the child theme now you can Import the Demo data that comes with the theme.
* You may have seen this Notification after the Child theme installation.![](https://docs.samarj.com/wp-content/uploads/2019/09/11.png)
* You just have to click on Begin Installing Plugins.![](https://docs.samarj.com/wp-content/uploads/2019/09/11111.png)
* Now Select all plugins and Select Install from the Dropdown and click on **Apply** Button.![](https://docs.samarj.com/wp-content/uploads/2019/09/6666.png)
* Once that Done click on Return to Dashboard.![](https://docs.samarj.com/wp-content/uploads/2019/09/66666666.png)
* Now Hover over to Appearance and click on **Import Demo Data**.
* Now Click on **Import Demo Data** Button to import all the Pages and Customizations etc.
* And all the Demo Data will be imported in a few minutes, Depending on your internet connection. When it’s done it will look like this.

![](/files/-MgVWJF9FfsDiq-OcJIG)


# Important Settings

To set up Woocommerce with the child theme correctly you’ve to do some settings for everything to work correctly.

In the Sidebar Hover to Woocommerce > Settings under Account and Privacy tab make sure all these options are selected and click on Save Changes.

![](/files/-MgVWecw3NLBzZlROHbL)

Under the Advanced tab make sure all the pages are selected.

![](/files/-MgVWf-T5v9uUDH2iIkA)

That’s it Woocommerce is Ready for the Go-On.


# Super Headers Collection

<figure><img src="/files/dAdtYsLDP6FMessD3vWh" alt=""><figcaption></figcaption></figure>

In order to install the [**Super Headers Collections**](https://samarj.com/super-headers-collection-for-divi/), you must first Purchase the [Elegant themes Membership](https://www.elegantthemes.com/affiliates/idevaffiliate.php?id=56146\&url=55671) and Download the[ Divi theme](https://www.elegantthemes.com/affiliates/idevaffiliate.php?id=56146\&url=55671).

**Super Headers Collection** is fully compatible with Divi v4.18+, just make sure that you’ve installed the latest version of the Divi theme. Some features may not work correctly if the Divi theme version is less than v4.18.

### **Requirements**

* Divi Theme
* WooCommerce (For Ecommerce Headers)
* Good Divi Knowledge
* Very Little CSS Knowledge (To make color changes in CSS)


# Installing Headers

## Step 1. Download Headers

After purchasing the Super Headers Collection, you'll have to download the Zip file to your Computer, you also go to your [Account Page](https://samarj.com/login) and download it again If you need.

Once the Zip file is downloaded to your Computer, you'll need to Extract it and you'll get these Files:

<figure><img src="/files/9Jy4PjpOdWEB0qqZUsXA" alt=""><figcaption></figcaption></figure>

Now If you want to install all 35 Headers on your site, you simply need the "All 35 Super Headers.json" file.&#x20;

But If you only need specific headers, you can navigate through folders and install the one you like using the same method below.

## Step 2. Installing Headers On Your Site&#x20;

Now to install all the Headers on your site, go to Divi -> Divi Library, and here click the "Import & Export" button at the top.

<figure><img src="/files/J0TQZwUmzJv8k5yVfZJJ" alt=""><figcaption></figcaption></figure>

You'll see a Modal appear, simply upload the "All 35 Super Headers.json" file by drag & drop (or you can even select) and then hit the Import button.

<figure><img src="/files/Sz3XJtGGyb4gbesExxkB" alt=""><figcaption></figcaption></figure>

Then, It will take around 10-20 seconds and will install the Headers on your site. Easy Peasy. All the Headers will be saved in your Divi Library and you can use any header on your site later on.

<figure><img src="/files/0VI1WBHiuichfJdWNU0H" alt=""><figcaption></figcaption></figure>


# Using Headers on Your Site

Now Let's see how you can use Any Header on your site from all 35 Designs. For that, first, you'll have to go to Divi -> Theme Builder and Click "Add Global Header.

<figure><img src="/files/XQmpotnkBBZdploDlGbw" alt=""><figcaption></figcaption></figure>

Now Click "Add from Library".

<figure><img src="/files/wn2wsu1K92dOI03ROPoe" alt=""><figcaption></figcaption></figure>

You'll see a Modal appear, where you can select the Header you'd like to use. You can filter from the Side panel for the Header Categories and then choose the one you'd like to use.

<figure><img src="/files/N6Uhf9JMagABT7sZ2UFK" alt=""><figcaption></figcaption></figure>

On the Next screen, click "Use This Layout".

<figure><img src="/files/GytieJsrDuD3D7yZKIzK" alt=""><figcaption></figcaption></figure>

And that's it, the Header will be installed as a Global Header on your site. Make sure to hit "Save Changes".

<figure><img src="/files/rkaZ2JXNV59WA4ACbDNR" alt=""><figcaption></figcaption></figure>

And Done, Congrats on making your Header look unique than other Divi websites!


# Saving Headers in Divi Cloud

{% hint style="info" %}
Note: Divi Cloud is a Paid Divi Service, which makes it easy for Agencies & Teams to work with Divi. Easily & effortlessly share Layouts & Templates without having to wait much.

[**Get Divi Cloud Today ->**](https://www.elegantthemes.com/affiliates/idevaffiliate.php?id=56146\&url=77490)
{% endhint %}

Now, Let's see how you can easily save Super Headers Collection to Divi Cloud. It only takes a few seconds.&#x20;

The Benefit of saving the Headers on Divi Cloud is that you can use them later on any site, the headers will be in the Cloud and when you want to use any header, you can simply choose the Header from the Cloud, and you won't have to go through import process again.

## Step 1. Enable Divi Builder on Any Page

First, you'll have to enable Divi Builder on Any Page and Hit the "+" Icon at the bottom.

<figure><img src="/files/RpYgVZaPmlihT0G8Ti6t" alt=""><figcaption></figcaption></figure>

## Step 2. Import to Divi Cloud

Now, you'll see a modal appear, hit the Portability Icon at the top and then drag & drop the "All 35 Super Headers.json" file and make sure to check "Import to Cloud" and hit the Import button.

<figure><img src="/files/iI56DSOWo6maV6pNGoFL" alt=""><figcaption></figcaption></figure>

And that's it, all the Headers are now Saved in your Divi Cloud and now you can use them on any site you like. Simply log in to your Divi Cloud Account on that site and Super Headers Collection should appear!

The Best part of Divi Cloud is that It also generates a Screenshot for the Header, so you can see the Header before Importing to the site.

<figure><img src="/files/ixDT0BDOlvVbI1eeXB7p" alt=""><figcaption></figcaption></figure>


# Installation Video

We have also created a full Video Tutorial for Super Headers Collection Installation Process and how to set it up Step-by-Step! You can watch it here:&#x20;

{% embed url="<https://youtu.be/f9s1oT4QOx4>" %}

We hope you find this useful and make your website headers more unique.


# How to Install Our Divi Layouts

Installing a Divi Layout is very simple and only takes a few seconds.

### Step 1. Download the Layout

So first, you'll need to make sure that you've downloaded the JSON file for the Layout on your Computer. If It's a Zip file, simply extract the zip file and you'll get a JSON file.

### Step 2. Enable Divi Builder on a Page

Once you have the Layout JSON file, you can now Create a New Page or Enable Divi Builder on an existing page.

### Step 3. Drag & Drop & Done ✅

Now, you'll have to Drag the JSON file from your Computer in the Divi Builder and you'll see a Popup appear in the Builder, you can tick "Remove Existing Content" and hit the Import button, and Boom, the Layout is installed on your Page. Happy Editing!


# Molti Ecommerce Wishlist Update

Action you need to take on you your existing Molti Ecommerce site to replace the Wishlist Plugin.

Molti Ecommerce previously utilized the TI Wishlist plugin, which has now been removed from the WordPress Repository. However, we have already released a new update to address this change and you need to do few things, that should only take a minute.

## What You Need to Do?

1. First take a complete backup of your site. And then update Molti Ecommerce to the latest version (v1.1.2). Follow our [guide here](https://samarj.com/?ns_url=258m\&mid=408474\&fch=b5a7e9ed) to learn how to update Molti Ecommerce to the latest version.
2. Then, simply remove the TI Wishlist plugin from your site and manually install the "[MC Wishlist](https://samarj.com/?ns_url=258n\&mid=408474\&fch=b5a7e9ed)" plugin on your WordPress site. Once installed, Follow [this guide](https://samarj.com/?ns_url=258o\&mid=408474\&fch=b5a7e9ed) to Import the Plugin settings on to your site.
3. And for the last step, you'll need to update TI Wishlist shortcodes with the MC Wishlist shortcodes. Here are the shortcodes for your ease:

* Update the shortcode for the Wishlist in the Global Header with this shortcode: \[wlfmc\_wishlist\_counter]
* And update the Shortcode on the Wishlist Page with this shortcode: \[wlfmc\_wishlist]

And that's it, make sure to clear all your cache afterwards for all the new changes to appear on your site. And these steps will make sure everything works perfectly fine on your site.

If you need any help, send us an email at <contact@samarj.com>.